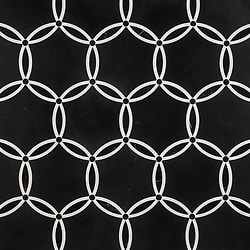
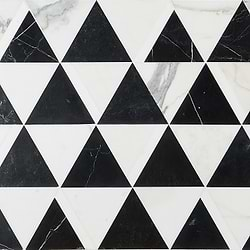
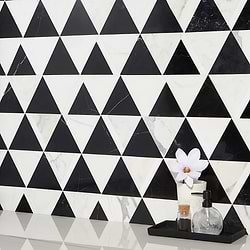
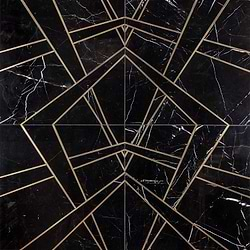
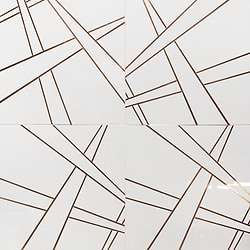
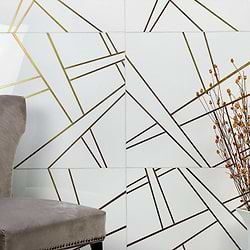
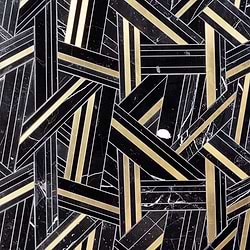
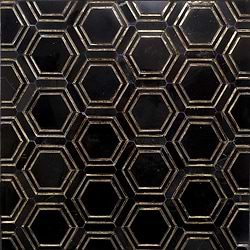
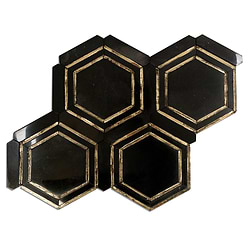
Gatsby Gold Nero & Thassos With Brass Line Polished Marble Tile
$47.59 / sq. ft.
$59.50
Loading...
All samples ship for FREE when you order 5 samples or more! Samples typically ship within 1-3 business days.
For all regular priced non-sample orders, get fast, flat-rate shipping. Standard Shipping orders ship in 7-10 business days. Expedited Shipping orders placed before 2pm EST Monday-Thursday or Friday by 10:30am ship the same day. VIP Freight typically ships in 1-2 business days. Ordering from TileBar means you're ordering from the source. Most products are in stock in our warehouses and ready to ship to your doorstep. Our fast shipping means you should expect to receive your order within 7-10 days. Need it sooner? Expedited shipping options are available at checkout.
* Flat rate shipping does not apply to closeouts, specially priced orders, slabs or scrap lots. Additional charges apply for shipping to AK, HI, PR and the U.S. Virgin Islands.
* Click here for more details.
Did you order too many tiles, or not 100% satisfied with your purchase? No problem. TileBar is happy to accept returns within 365 days of your order. Please read the following information carefully.
1. You must request an RMA (Return Merchandise Authorization) form by emailing [email protected].
2. Samples, clearance, FINAL SALE items, and custom orders are non-refundable.
3. In order for us to continue to be able to offer affordable pricing, a 15% restocking fee is assessed on all returns. Shipping charges are non-refundable. Customer are responsible for return shipping charges and arrangements.
4. All returns must be in their original packaging and in the condition in which they were received.
* Click here for more details.
-
$32.00
-
$12.99
-
$21.99
-
$19.99
-
$11.99
-
$21.99
-
 $25.50
 -
$1,850.00
-
$3,395.00
-
$1,995.00

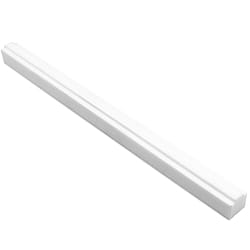
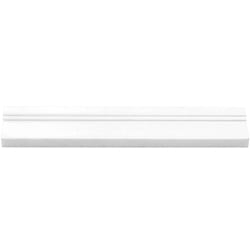
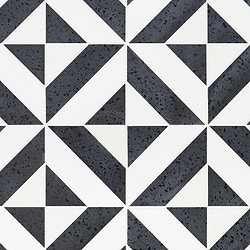
Key Specs
- Chip Size 4" x .87"
- Color Black & White
- Commercial Wall | Floor
- Residential Wall | Floor
- Tile Finish Polished

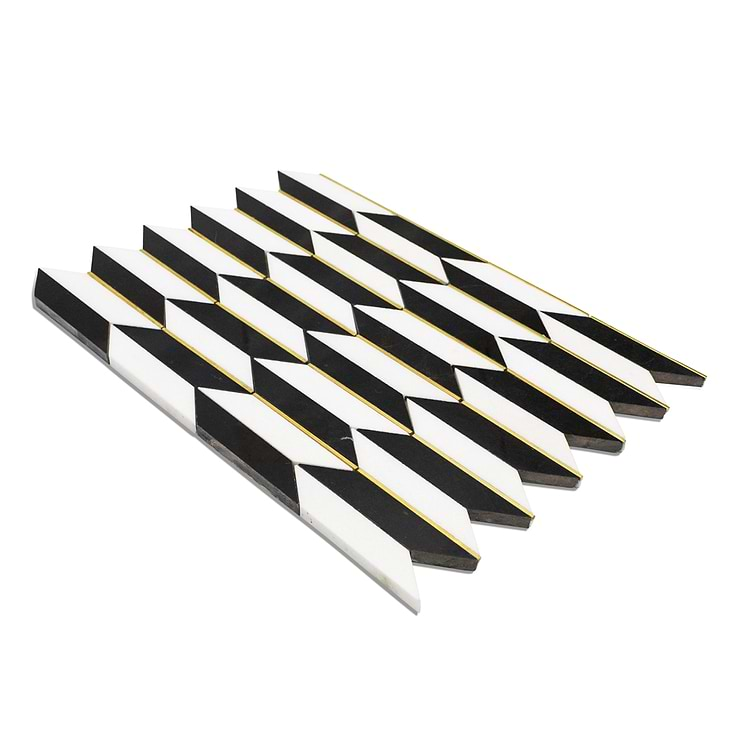
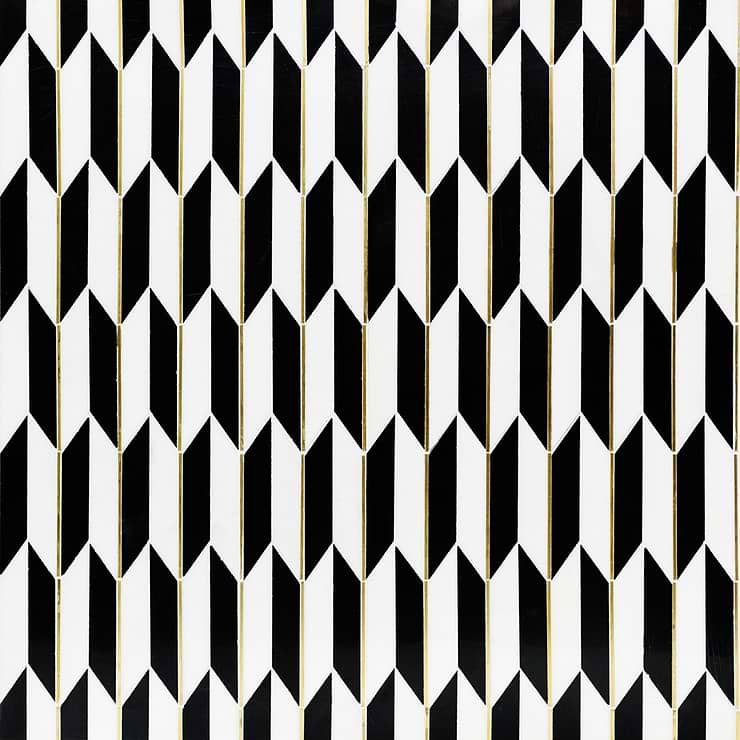
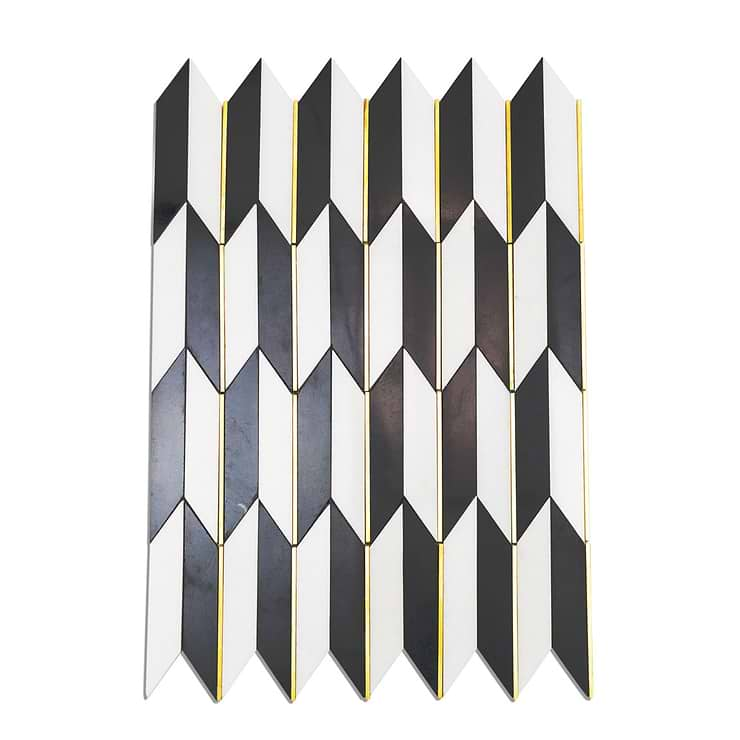
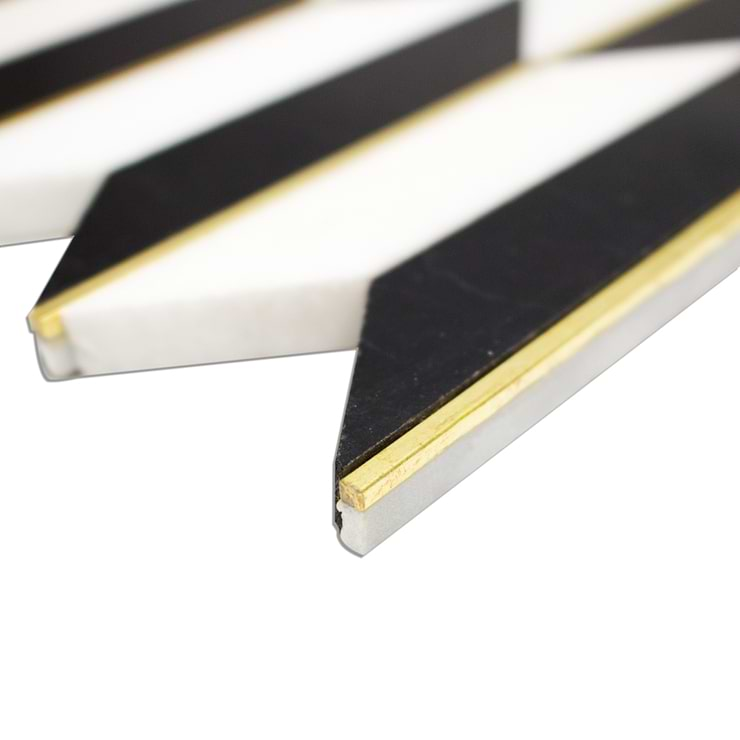
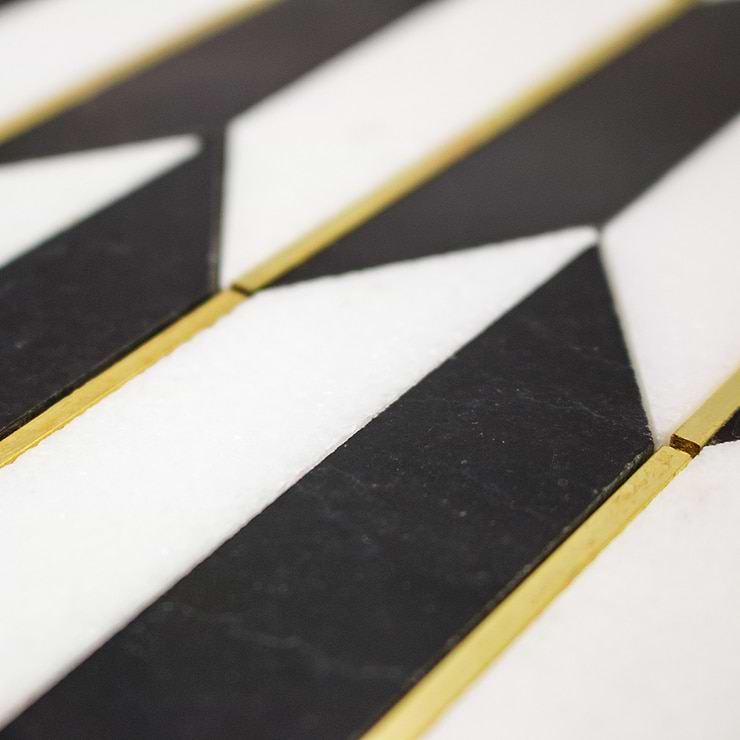
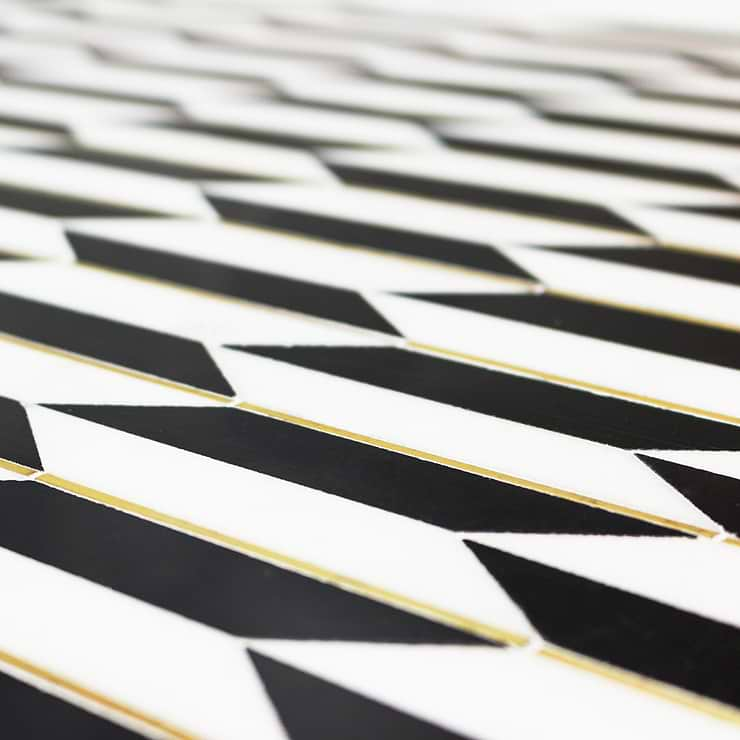
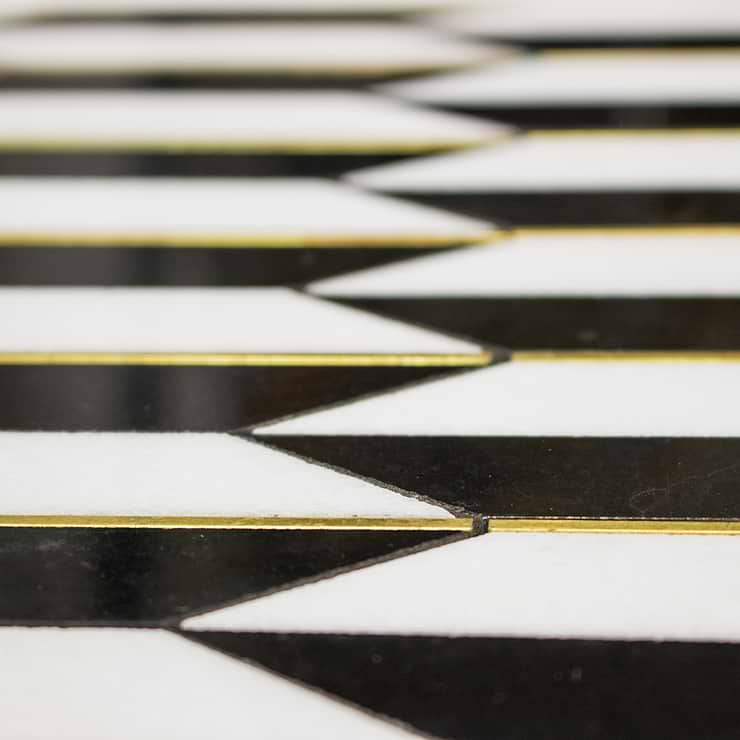
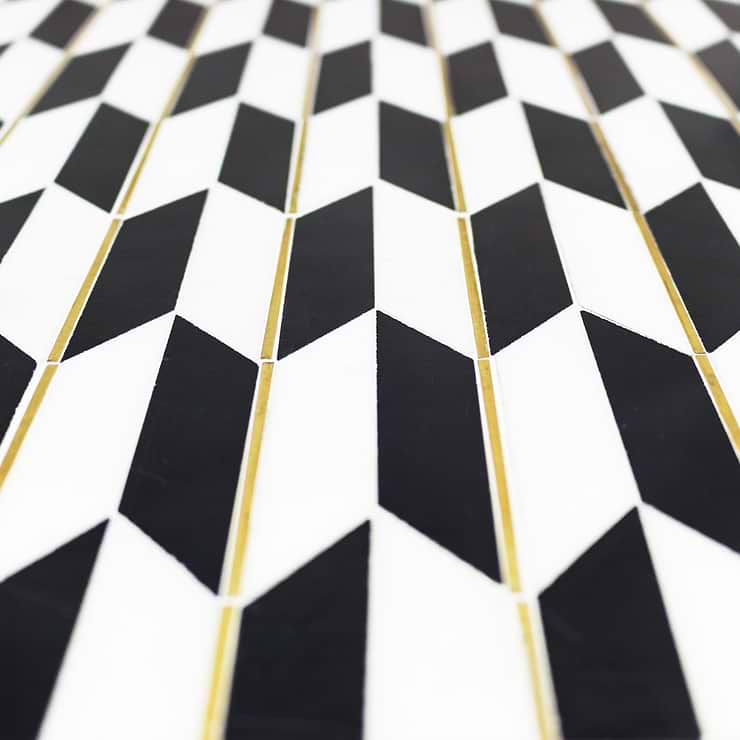
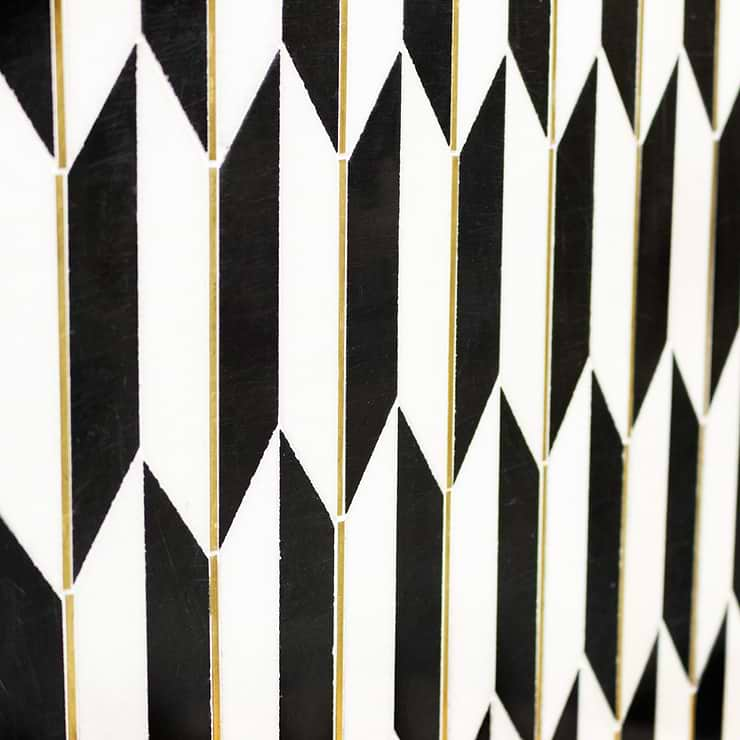
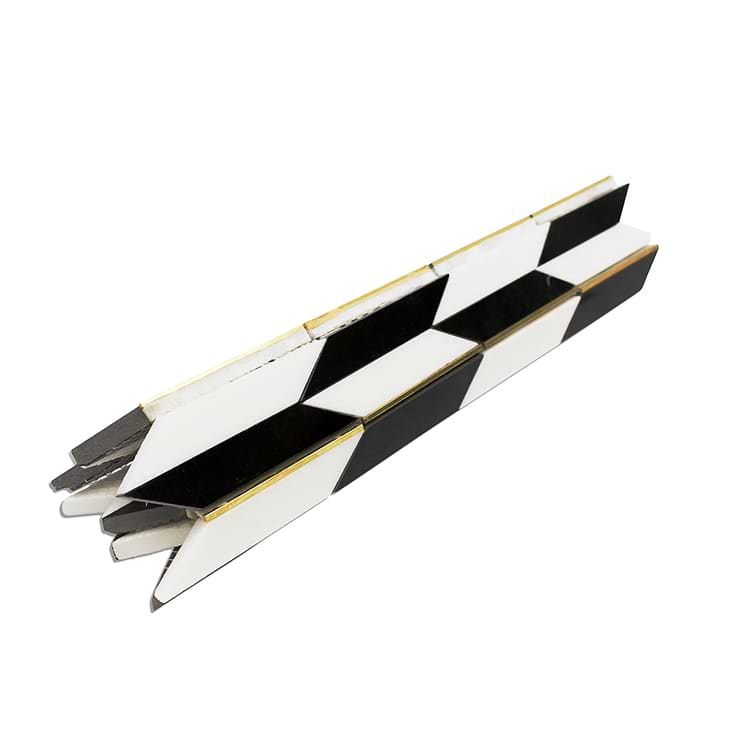
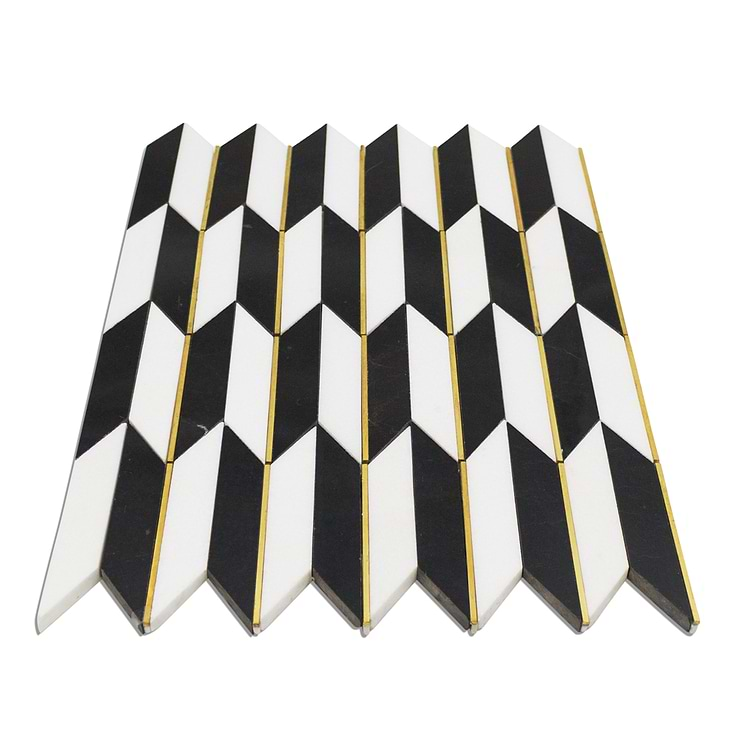

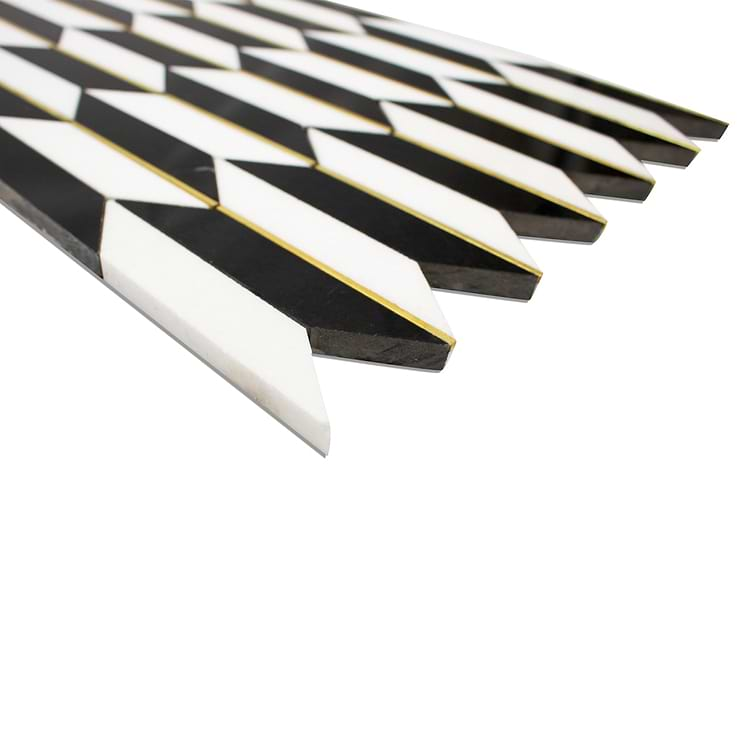
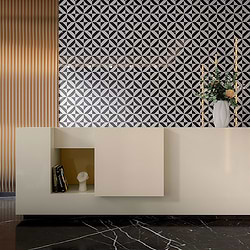
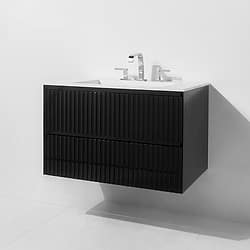
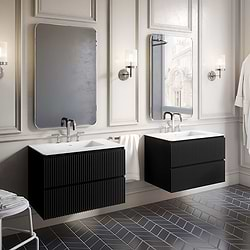
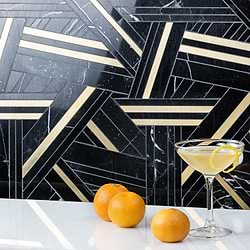
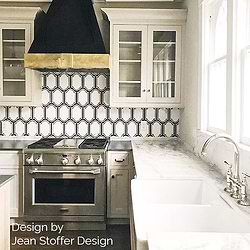
Can't repeat the past? Why of course you can! Art Deco architecture and design thrived between the 1920's and the 1940's, and today we still see many design projects seeking to incorporate the stylistic principles and design motifs of Art Deco. Gatsby reinvigorates the roaring twenties with a bold and modern sensibility combining Nero Marquina and White Thassos marble with brass line accents in a pattern that will instantaneously transport you back to the era of flappers, bootleggers, seersucker suits and ridiculously cool cars.
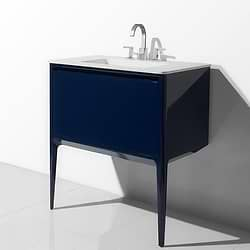
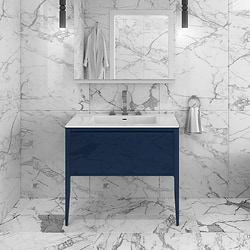
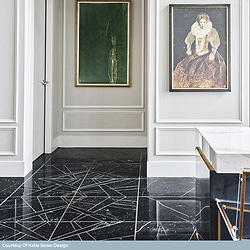
""Our client loves the aesthetic of the Kardashians homes (hence Dash); bold, sophisticated and cutting edge. Once we saw the Gatsby Gold Nero & Thassos With Brass Marble Tile we knew right then and there it was a match made in glam heaven! We incorporated plumbing that was designed by a jewelry designer and touches of brass throughout. The bathroom was not complete without a framed Gucci scarf, of course."⠀
See Project by Widell & Boschetti.

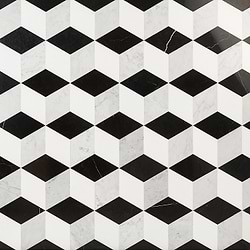
Key Specs
-
Chip Size
4" x .87"
-
Commercial
Wall | Floor
-
Item Color
Black, White and Gold
-
Material
Thassos + Black Marble
-
Residential
Wall | Floor
-
Tile Finish
Polished
Details
-
Available Sizes
1x4", 12x32", 24x24", 24x48", Mosaic
-
Coverage
1.24
-
Location
Backsplash, Bathroom, Indoor, Kitchen
-
Look
Decorative Look
-
Pattern Shape
Exotic
-
Sample Size
2.2" x 4.3"
-
Size
15.75' x 11.375"
-
Stone Type
Black Marble, Thassos
-
Style
Art Deco
-
Thickness
10 mm
-
Tile Use
Backsplash, Bathroom Floor, Bathroom Wall, Commercial Floor, Floor Tile, Kitchen Floor, Kitchen Wall, Wall Tile
-
Weight
5.8 lbs
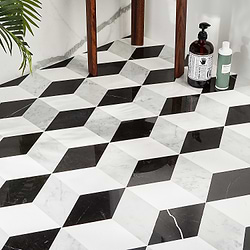
When installing natural stone and marble tile, make sure all your products, substrate, tile, thinset and grout are compatible with each other. Inspect all materials before use and getting started. Dry lay or do a mockup to confirm your layout, grout joint size and that the final look meets your expectations.
Download our installation guide here.
Download our care & maintenance guide here.
General Notes
- All installations should refer to the most current TCNA manual. Tile Council of North America 864.464.8453 Home - The Tile Council of North America (tcnatile.com)
- All TileBar installation instructions are suggestions. Specific installation questions should be brought to a local tile professional.
- Follow directions on all materials, especially mixing quantities.
- Inspect all materials before using to make sure there are no defects. Installation is acceptance, material claims will not be entertained after install.
- Blending different boxes of tile is recommended before and during installation.
- Ensure proper Safety – PPE (ex: Gloves)
Stone Products
As products of nature, dimension stone will have inherent variation in color, shade, and character, included markings and veining, throughout any given lot of material. Water Sensitivity – Green colored marble and serpentines can wrap or curl. Filled voids can polish differently from the actual stone it fills.
Shop This Collection
-
$64.50 sq. ft.
-
$32.35 sq. ft.
-
$38.99 $301.78
-
$69.50 sq. ft.
-
$59.99 $106.18
-
$89.50 sq. ft.
-
$99.50 sq. ft.
-
$34.95 sq. ft.
-
$42.95 sq. ft.
-
$17.99 $24.65


-
$32.00
-
$12.99
-
$21.99
-
$19.99
-
$11.99
-
$21.99
-
$25.50
-
$1,850.00
-
$3,395.00
-
$1,995.00
Recommended for You
-
$48.59 $35.47
-
$29.99 $44.39
-
$24.50 sq. ft.
-
$44.94 sq. ft.
-
$53.99 $119.86
-
$44.94 sq. ft.
-
$24.50 sq. ft.