
Many of us have found ourselves living with a bathroom that feels worn and dated. We’ve tried a different paint color on the walls or cabinets, lights above the vanity, or even new plumbing fixtures, but nothing can distract from bad tile. Whether it is damaged, boring, or just plain ugly, the bathroom shower tile that we see every day has a lasting impact on our mood, and a great shower space can give us the best start to our day or become a much-needed retreat from the world.
So how do we change the tile in a shower or tub surround to become your favorite place to take anyone who visits your home? With the right planning, right tools, and the right help, you can have a successful tile project of your own. Let’s take a look at some essential steps to get you started and that much closer to loving your bathroom.
Make a Plan
Make a plan! Whether it’s a shower tile floor or wall, it is the most important part of the project overall. You will want to make most of your decisions before you touch your walls or even purchase any tools or materials. This step will not only determine how much time and money that your new tiled shower will take, but also allow you to plan on the areas and steps where you will need to call in a professional to help. Let’s take a look at some questions that will help you get started.
Is my current shower layout working?
Removing tile from your shower opens up your walls and is a great time to relocate plumbing to better work for your space. It can be as simple as moving your shower head up for a taller person, or something bigger like changing from a tub/shower combination to a walk-in shower. This is also a great opportunity to fix any issues like leaky faucets and get your bathroom up to modern building standards. Interested in a walk-in shower?
Check out 4 Things To Know Before Designing A Walk-In Shower to see if this is the right option for you.
How much work do I want to do myself?
If you are moving plumbing around, you will definitely want to hire a licensed plumber. They will only work on the pipes and fixtures, however, so you may want to also consider hiring a professional tile installer. An experienced tile setter will not just make your shower look clean and beautiful, but they will also create a waterproof system that won’t leak. Water is sneaky and will find a weak point, so the cost of an experienced tile installer is not much when compared to water damage that you don’t see until it is too late.
How much do I want to spend?
Tiling a shower is not just about the tile. Plumbing, fixtures, waterproofing, accessories, and finding great help all add to the cost of your project. It is a great idea to create a budget and see how much you can expect to spend.
Which tile is best for my shower?
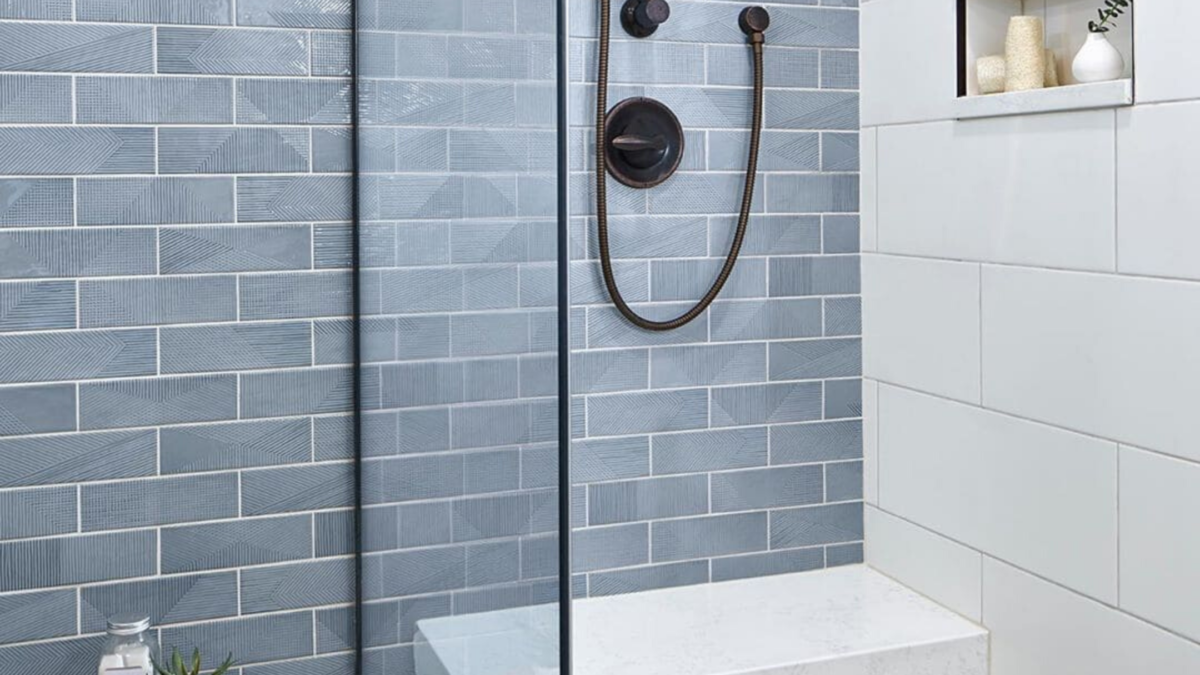
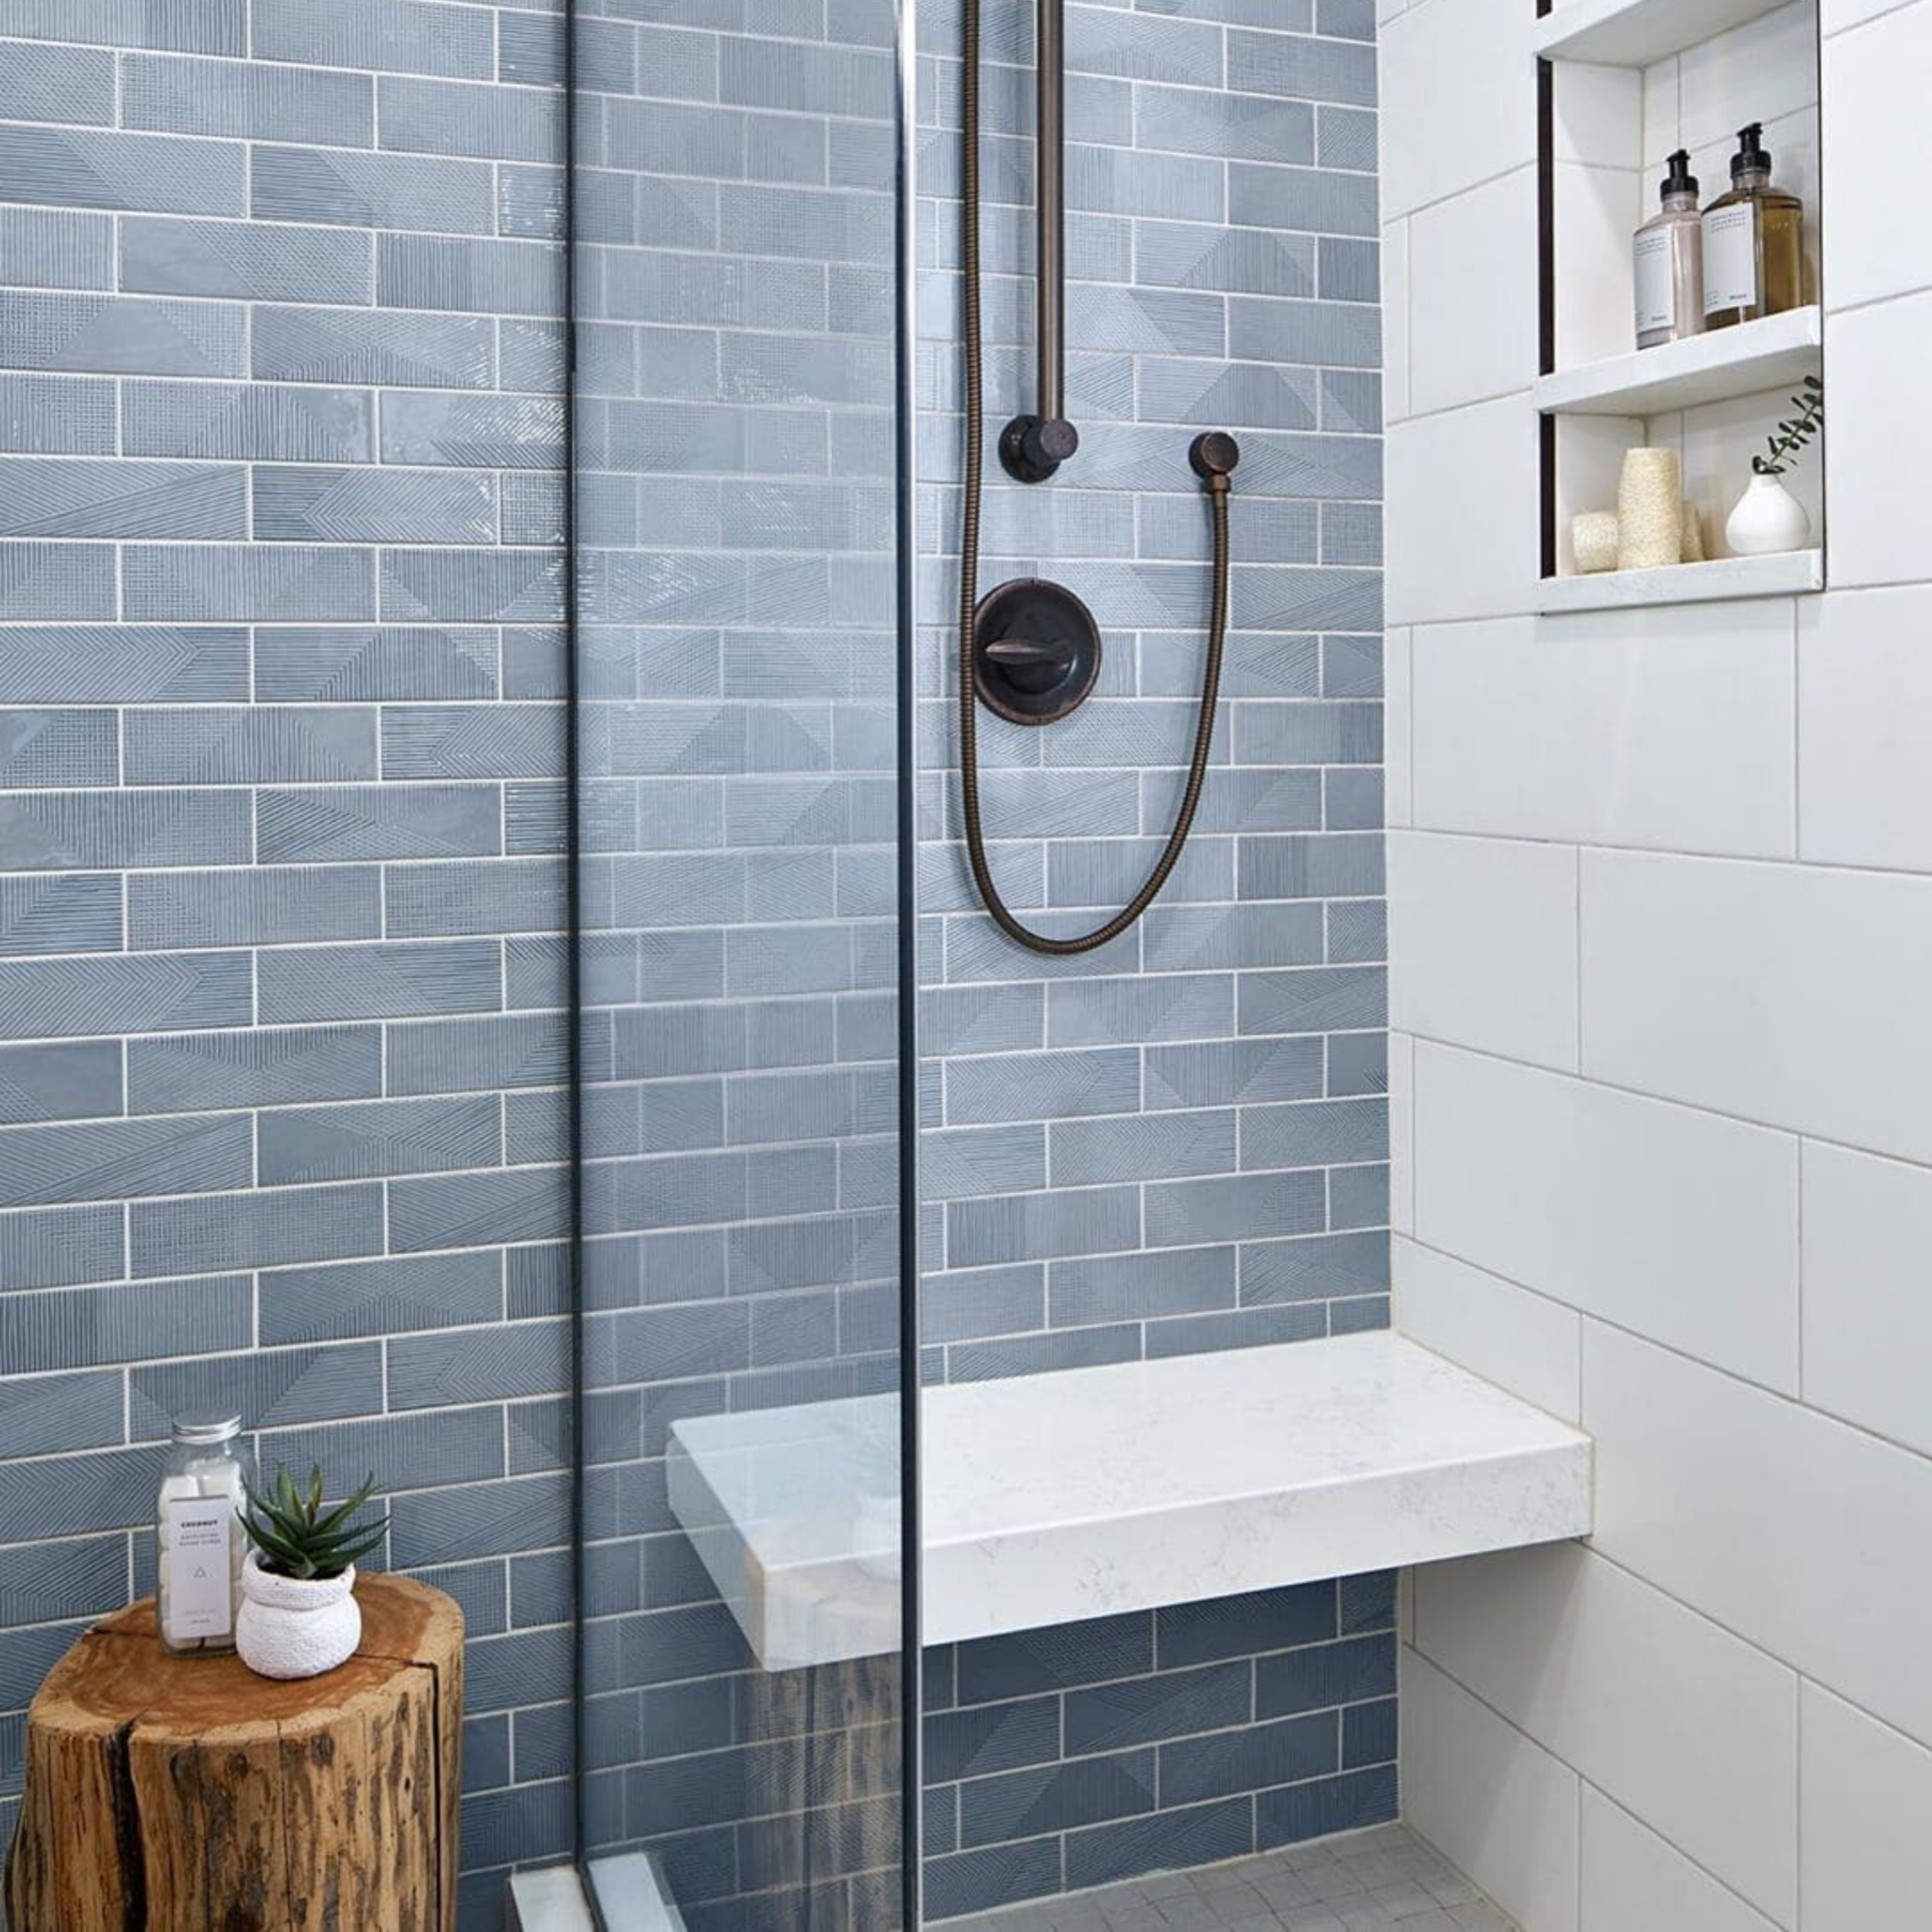
Browsing through shower tile ideas can start off fun but can quickly become overwhelming. Typically, shower walls can be a wide variety of different tiles, as long as they are cleanable. Shower floor tile, on the other hand, needs to be slip-resistant and can slope down to the drain if you are not using a tub or a pre-made pan, and that is why mosaics are often used in these areas. Beyond this, the most important feature of a tile is that you love it! For more info on selecting a shower tile, take a look at What to Consider When Choosing Shower Tiles.
Also, check out these different looks for inspiration:
Prepare Your Shower Area for Tile
Once you have a plan and are ready to start, you will need to get your shower ready for tile. This can involve some major work, so let’s run through some typical steps that you can expect.
Protect the Project Area
Start by protecting the floors, walls, and other areas next to your shower from dust and debris. If you are keeping your bathtub, make sure to protect it as well so you don’t ruin the finish. And most importantly, don’t forget to protect yourself by always wearing the proper safety gear, including a respirator or mask, while working – it’s about to get dusty in here!
Remove Your Old Tile or Fiberglass Shower Wall
Use a hammer, chisel, and crowbar to remove the tile or shower wall. You will also be removing the drywall, backer board, or lathe and plaster that the tile or shower wall is attached to, so get ready for some major muscle movement! Once this is complete, make sure to remove any nails or screws that remain.
Relocate or Replace Plumbing
This should involve a licensed plumber to make sure that all building codes are followed, and everything is fitted properly. You should also make sure to coordinate any fixtures or drains with your tile layout and accessories so that there are no bad surprises.
Install New Wall Board
Time to install a new wallboard onto your studs in your shower area. Depending on which waterproofing system you choose, this could be a cement board or even wall panels with a built-in waterproof membrane that helps you with your next step. Did we say waterproofing – a lot? Absolutely! Check out the next step for more info.
Install Waterproofing
It is a big misconception that tile and grout are “waterproof”. While the tiles themselves can be in some instances, the grout lines and joints are not. You must create a system where the water on the walls and floor makes it to the drain and nowhere else in your space. Check out Laticrete’s Hydroban System. Laticrete is incredibly helpful for both knowledge and instruction about waterproofing and its benefits.
Slope to Your Drain
Now that everything is watertight, it is time to create a sloping floor for your drain. This is where an expert tile installer comes in handy with their sand and cement mixtures, or you can use kits like this one: HYDRO BAN Shower Pan Kit – LATICRETE. If you are looking for shower floor tile ideas, mosaics are a great option thanks to their ability to accommodate this sloping.
Check out some of our favorite tile shower floor styles that are creating a buzz.
Have the Right Tools
Make sure that you have all of the tools you need before you get started so that you don’t have to stop at a crucial point in the process. These usually include proper trowels, sponges, bucket, mixing drill and paddle, grout spacers, grout float, and a levelling system –Tile Leveling Adjustment Tools – Easy Tile Leveling – Spin Tile Leveling (barwalt.com). This innovation can assure that you have a nice and uniform installation, and who doesn’t want that?
Create a Tile Cutting Plan
You need another plan – a tile cutting plan. It is best to know how to cut shower tiles and every cut that you will have to make ahead of time to not only have enough material but to also let you fully plan for your pattern and where you want it to be placed.
Start Where It Makes Sense
Start laying tile where your pattern matters the most. If you want to center a pattern or align with an important feature, start with these areas and work around them. It is better to rework the edges of a wall rather than your favorite detail. You can also choose to work on the shower wall tile or floor tile, depending on your pattern.
Mix Your Thinset
Thinset is a mixture of cement and sand that you will combine with water in a bucket and then mix using a mixing drill with a long paddle attachment. You must follow the instructions so that you get the right consistency for your tiles to stick properly!
Attach Your Tiles
Use your trowel to apply thinset to your wall or floor as recommended by your tile installation instructions. Installation videos may make this part look easy, but it will take a few tiles before you can really get the hang of this art form. Work quickly and precisely to place your tile, using spacers to create uniform grout lines, knowing that you have a short window to move the tiles into their final place.
Check Your Work
Once you have all of your tiles in place, make sure to clean off any thinset on the tile faces or clear out any thinset that would get in the way of your grout. While you can remove it later, it is so much easier before it hardens!
Let the Thinset Dry
It is time to wait for the thinset to dry according to the manufacturer’s instructions, which is usually 24 hours. It is a great time to be dreaming about how fabulous your new shower will look, or what you want to tile next!
Time for Grout
Prepare your grout as recommended by the manufacturer in small batches and use a grout float to push it between the tiles in a diagonal motion. You can then wipe it with a clean, wet sponge after about ten minutes to remove any extra from the tile face and even out your grout joints. A quick note on this: Don’t put grout in any vertical corners or transitions at niches, seats, or accessories.
A note on Grout
Grout may seem like an afterthought in the tiling process, but it plays an important role in both how your finished tile will look and perform. Along with color, there are also many types of grout to choose from with the two most popular being sanded grout, which is typically stronger and is used with tiles that have a more durable finish, and non-sanded grout which doesn’t scratch glass or special finishes on tile.
There are also several speciality grouts available to help with maintenance, cleanability and or other needs. Check out Laticrete’s Grout options that can help you select the right product for your project, and also browse TileBar’s extensive selection collection of grout solutions to have your tile installation looking great and performing even better.
Don’t Forget the Caulking
Did you know that movement happens with tile installations? Your walls and the tile material itself can expand and contract so it is important to leave vertical joints and any transitions at niches, seats, and accessories free of grout so that color-matching caulk can be installed, like Latasil Silicone Sealant | Laticrete. This can help prevent the tile or grout which you can learn more about in the article Why Tile Grout Cracks.
Changing Tiles in a Bathroom: Selecting the Right Bathroom Tiles
Let’s discuss some additional information that will be helpful in planning a tiling project. With the choice of shower tiles, the number of options you have can be glaring. At this point making well-informed choices is of great consequence for the long-term efficiency and beauty of the shower area. Let’s delve deeper into the key considerations of shower tile installation, what you need to tile a shower, and where to start with tiling a shower.
Choosing Water-Resistant Tiles

The first step in changing a shower’s tiles is choosing tiles. A waterproof tile is the basis of a perfect shower that will last for ages.
When installing shower tiles, most homeowners choose ceramic or porcelain tiles for their walls and flooring.
This stems from the unrivaled durability and water filtration. When changing tiles in the bathroom, choose ceramic or porcelain tiles to be assured that your shower can hold against the challenges of a damp setting.
Exploring Types of Wall and Floor Tiles


The knowledge of the different types of tile suitable for shower walls and
floors is necessary when thinking
about how to install tiles for your shower.
Porcelain tiles, known for their strength and low water absorption, are excellent for shower floors. For walls, consider ceramic or glass tiles for added visual appeal. Large-format tiles (12 inches or more) have seen a growth rate in popularity over the past five years. These tiles not only provide a sleek, modern look but also reduce grout lines, making maintenance more manageable.

Tailor your tile choices to the specific requirements of shower walls and floors. Consider both functionality and aesthetics.
Aesthetics and Functionality in Tile Selection

Tiles do more than just protect your shower from moisture; they also contribute to the look and feel of the space.
A well-chosen tile design and installing said tiles in your shower can add substantial value to your home. Real estate agents recommend focusing on neutral colors and timeless patterns to enhance resale value.
Strike a balance between aesthetics and functionality. Select tiles that not only complement your style but also add value to your property.

How to Prepare Shower Walls for Tile Installation
The Foundation of Success
Water damage accounts for the majority of failures when installing shower tiles. Thus, the first step on how to tile a shower wall is to focus on proper waterproofing during surface preparation. A solid, even surface is the foundation for a lasting and trouble-free installation.
Backer Boards: Your Shield Against Moisture
Backer boards, such as cementitious boards, are your allies in the fight against moisture and mold. These boards provide a stable base for tile installation, ensuring your hard work stands the test of time.
The Flat and Level Mandate
Among the advice on how to replace shower tile walls, professional tile installers stress the importance of a flat and level substrate. Take the time to achieve this foundation for a successful tiling project.

How to Install Tiles in a Shower: Applying Adhesive When Installing Shower Tiles
With the preparations done, let’s move on to the tasks of getting your shower vision implemented. Of the steps of how to tile a shower, applying adhesive and tiling require great attention to the detail. It’s to ensure an expert look that lasts. Let’s break down the process: The chemical reaction.
Choosing the Right Adhesive
Selecting the right adhesive is a key step in installing tiles for your shower. They ensure a successful and permanent tiling. Different kinds of tiles require dedicated adhesives. Consult with your tile manufacturer or supplier to ascertain the most appropriate adhesive for the chosen tiles.
Match the adhesive to the color of your shower tiles for the best bond strength and durability.
How to Apply Adhesive
Applying adhesive and setting tiles is an attentive process that has to be done in stages. A good tile saw can improve efficiency. This way, the probability of chipping or breaking the tiles during cutting is diminished.
Invest in quality tools and follow a step-by-step guide. You will get the correct and time-saving application of adhesive and tile settings.
Shower Tile Install Tips: Appropriate Spacing and Alignment
Space and alignment are key factors in making your shower tile attractive. HomeAdvisor advises to buy sturdy, rust-proof notched trowels and spacers. This method guarantees exact tile alignment and even grout lines.
Don’t overlook the effect of correct spacing and alignment of your shower on its aesthetics. Ensure your tiles are neatly placed.
Know the subtleties in selecting the correct tiles and using the adhesive. It prepares the ground for a spectacular and successful shower installation blueprint. The mixture of beauty and usability keeps your bathroom looking good and can stand the test of time.
Clean-Up and Maintenance
Post-Installation Polish
Ensure a polished finish by following post-installation clean-up tips. A little effort here goes a long way in enhancing the overall appearance of your tiled shower.
Ongoing Maintenance Wisdom
Guidance on ongoing maintenance is key to ensuring the longevity of your tiled shower. Regular care and attention will keep your installation looking fresh and new for years to come.
Recommended Cleaning Products
Choose the right cleaning products and establish a routine to keep your shower tiles looking pristine. The right products ensure the installation is intact.
Frequently Asked Questions
How long does it take for the tiles to set in the shower after installation?
The setting time can differ but normally falls within 24 to 72 hours. The type of adhesive and environmental conditions will be the determinant.
What is the 3-4-5 rule for installing shower tiles?
This method shows where to stop tiles in your shower. It used to have a perfect square corner. It’s a measurement ratio of 3:4:5 meaning a three-foot length straight line, a four-foot length perpendicular line, and a five-foot length across.
What is the right spacing when installing shower tiles?
For smaller tiles, around 2-3mm is recommended since they look better with thinner grout lines. Meanwhile, larger tiles or those with uneven edges look better with wider grout lines, measuring 3-5mm.
Conclusion
In a nutshell, changing tiles in a bathroom or installing shower tiles necessitates a planned procedure and precision. Recall that the devil is in the details, so spend your time and energy on creating a shower that is not only stunning but functional as well. Share your tales with us, and do not wait for the worst-case scenario to call a professional.
Elevate your showering—make it detailed and elegant. Start with a beautifully tiled shower today.
If You Need Help
If you have any questions, issues, or problems during your tile project, it is always best to stop and seek professional guidance before continuing. TileBar is always available to help with any questions you may have about your tile from different types to shower floor tile designs, so feel free to reach out or check out our Tileist Learning Center for more like 10 Walk-In Shower Tile Ideas That Will Inspire You.
An Important Note…
Tiling is not a small project, but it is a rewarding one, and we hope that you have a better idea of what to expect when you tile a shower. While we have tried to include the typical steps involved, we know that you will have specific questions and issues about your unique project that goes beyond these helpful hints. You can look at great installation guides like Laticrete’s Shower Installation Systems or find more help at The Tile Council of North America’s website, who literally wrote the book on this stuff. We are happy to help with tile, grout, and setting materials, but always ask your favorite plumber and tile installer for help. Success is a team effort and we are happy to be on yours.
Join our social networks