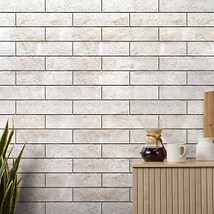
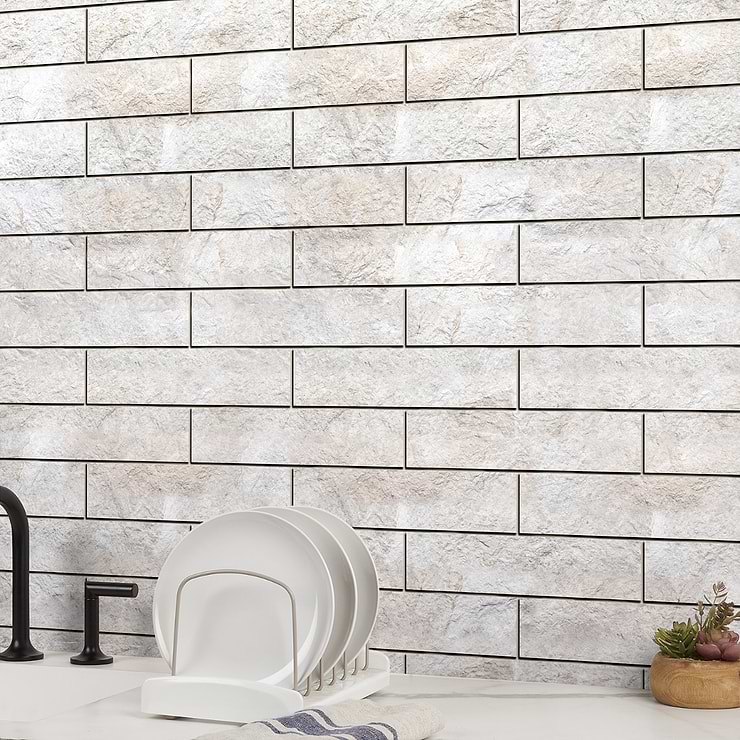
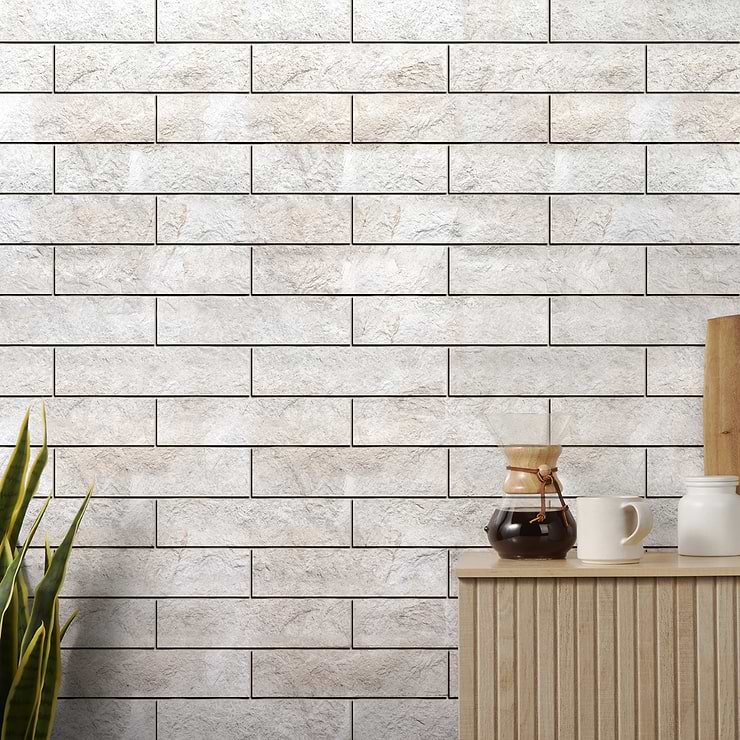
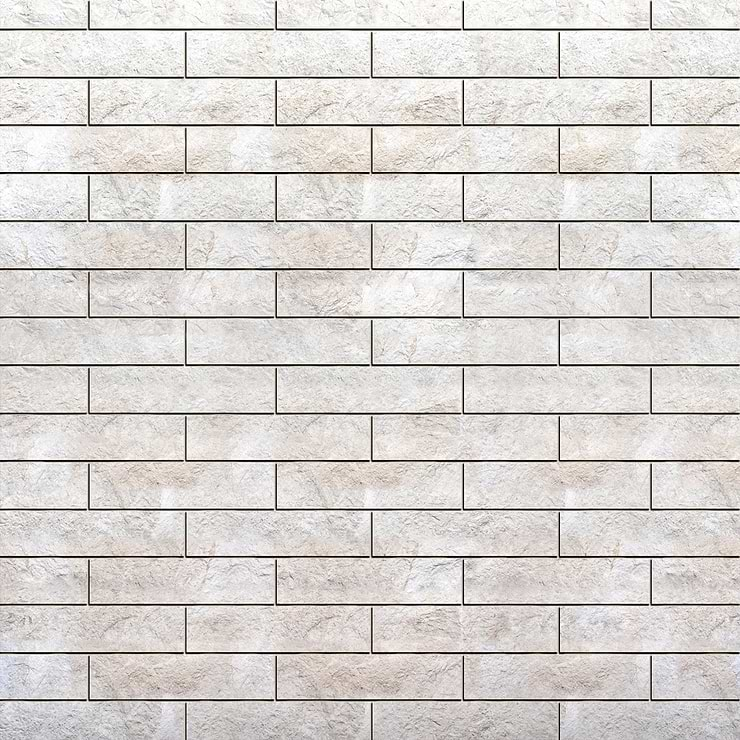
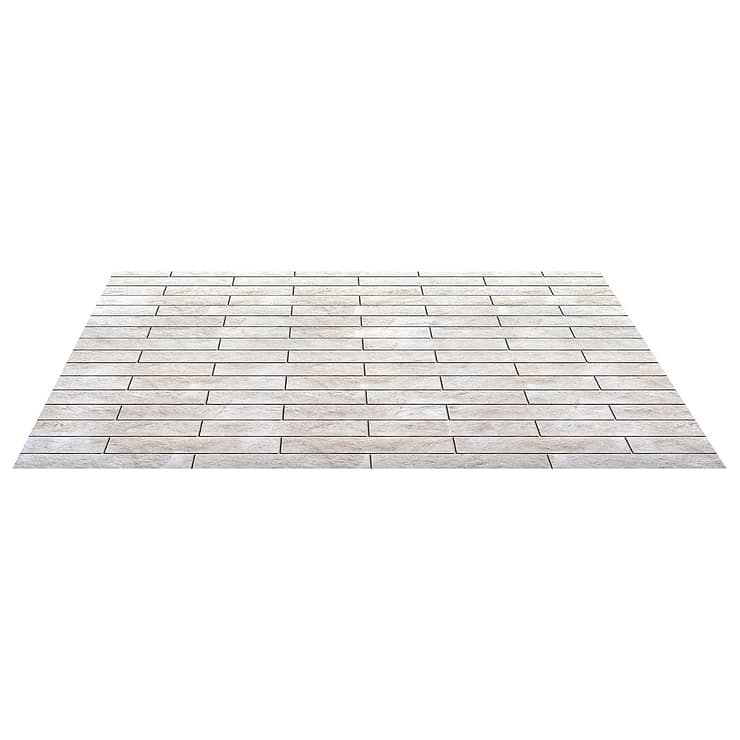
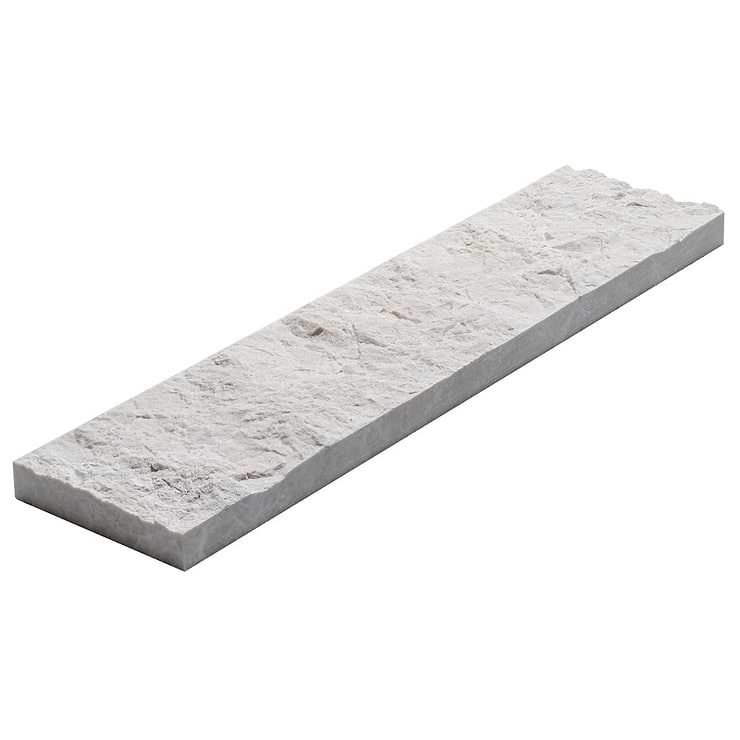
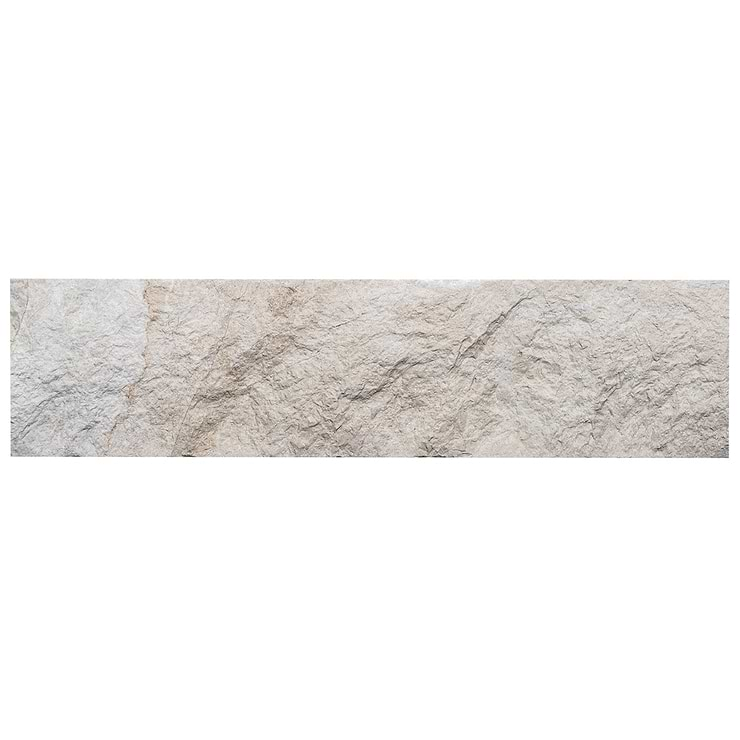
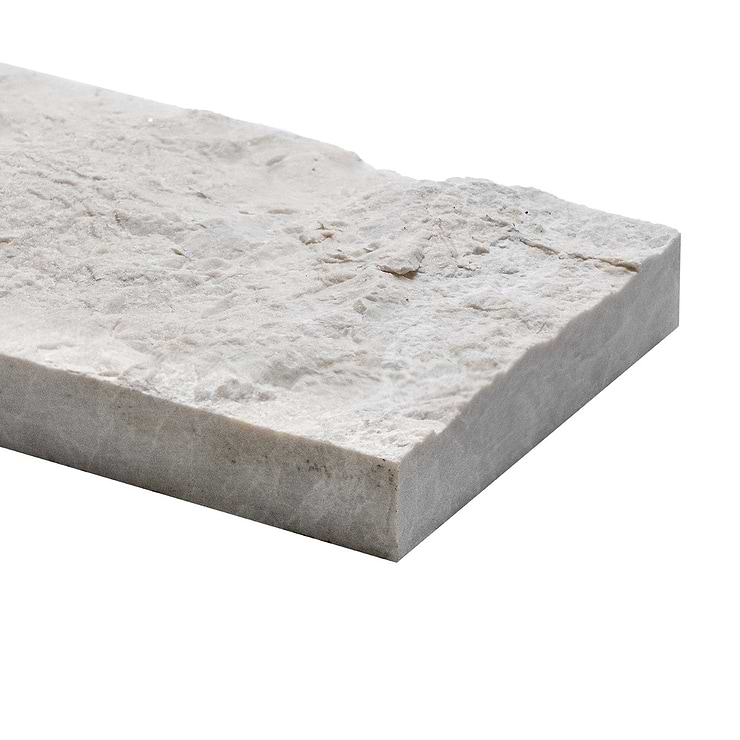
Cream Misto Splitface Rustic Beige 3x12 Textured Marble Tile
Loading...
All samples ship for FREE when you order 5 samples or more! Samples typically ship within 2-4 business days.
For all regular priced non-sample orders, get fast, flat-rate shipping. Standard Shipping orders ship in 5-7 business days. Expedited Shipping orders placed before 2pm EST Monday-Thursday or Friday by 10:30am ship the same day. VIP Freight typically ships in 2-4 business days. Ordering from TileBar means you're ordering from the source. Most products are in stock in our warehouses and ready to ship to your doorstep. Our fast shipping means you should expect to receive your order within 10-14 days. Need it sooner? Expedited shipping options are available at checkout.
* Flat rate shipping does not apply to closeouts, specially priced orders, slabs or scrap lots. Additional charges apply for shipping to AK, HI, PR and the U.S. Virgin Islands.
* Click here for more details.
Did you order too many tiles, or not 100% satisfied with your purchase? No problem. TileBar is happy to accept returns within 365 days of your order. Please read the following information carefully.
1. You must request an RMA (Return Merchandise Authorization) form by emailing [email protected].
2. Samples, clearance, FINAL SALE items, and custom orders are non-refundable.
3. In order for us to continue to be able to offer affordable pricing, a 15% restocking fee is assessed on all returns. Shipping charges are non-refundable. Customer are responsible for return shipping charges and arrangements.
4. All returns must be in their original packaging and in the condition in which they were received.
* Click here for more details.
Why You'll Love It
- 01Durable natural stone with timeless appeal
- 02Produced with a commitment to sustainability
- 03Made for residential and commercial walls
- 04Great for kitchen, backsplash, bathroom, shower


A signature look
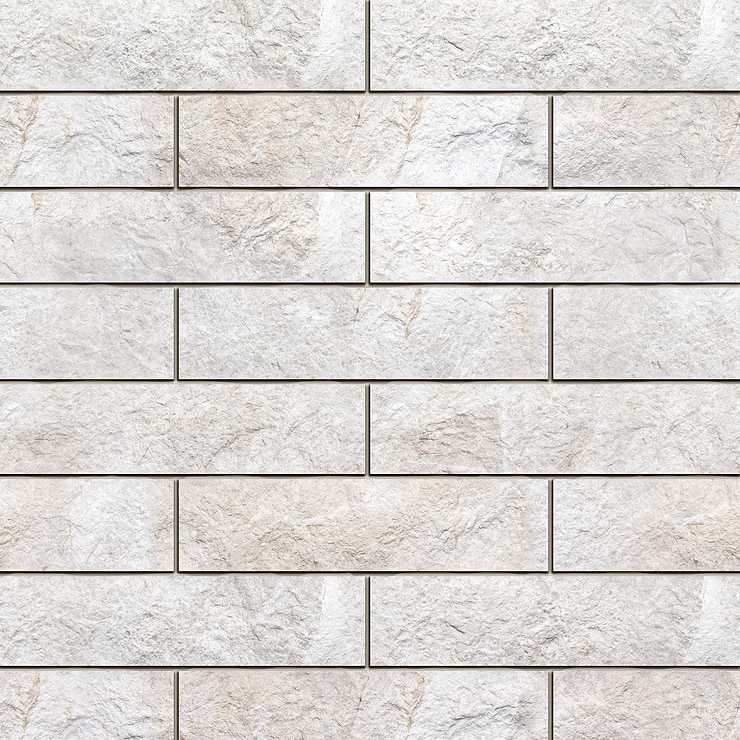
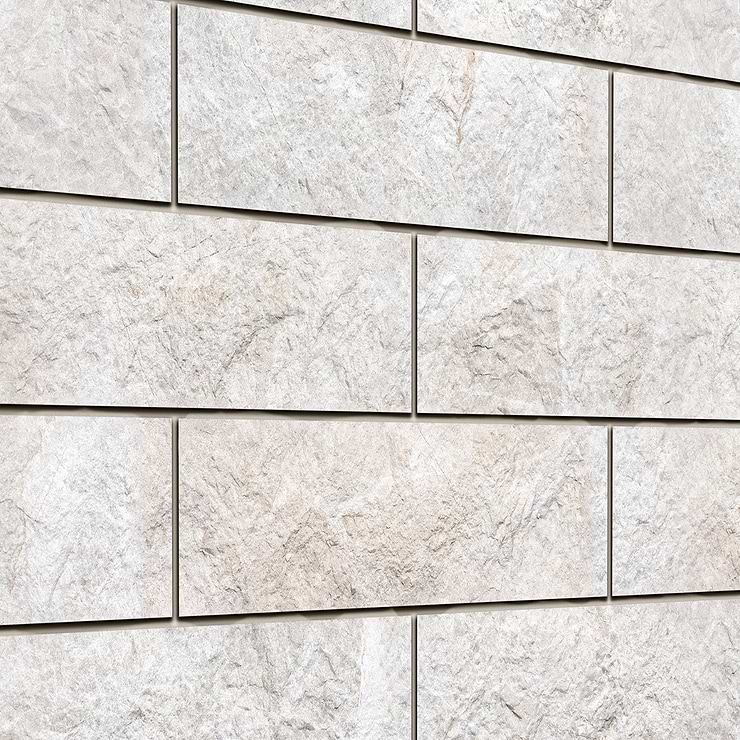
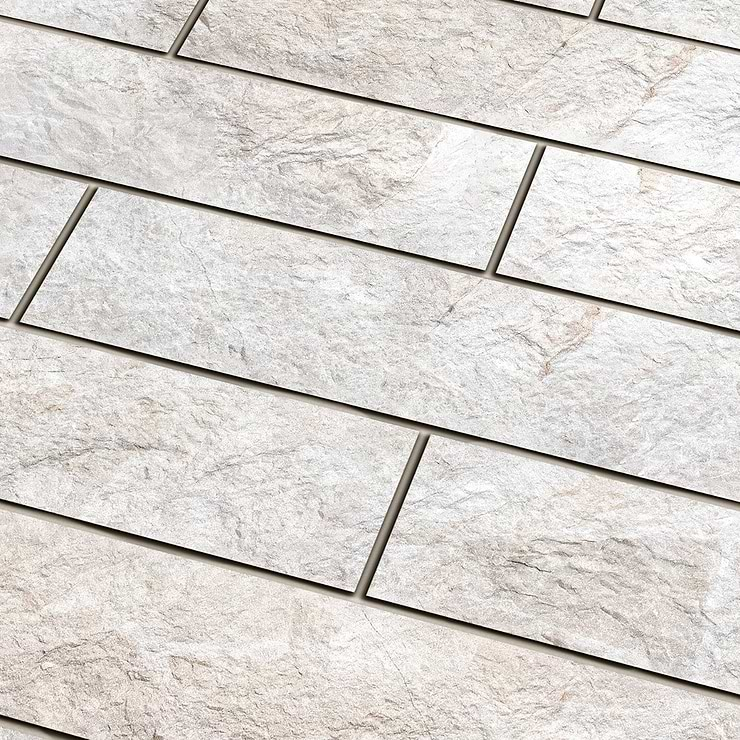
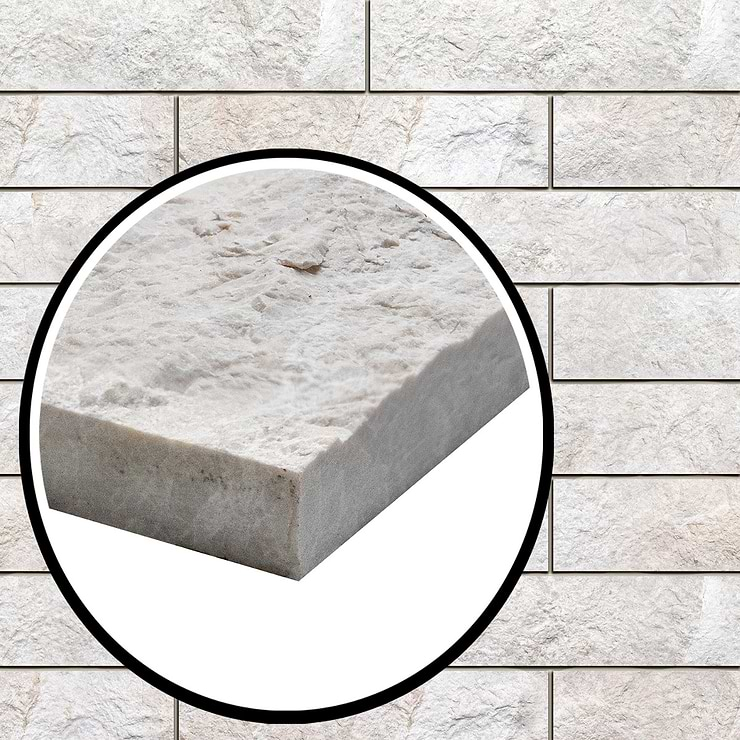
Adorn your walls with the roughly hewn Cream Misto Splitface Rustic Beige 3x12 Textured Marble Tile. This collection features the signature warm color variations characteristic of this natural stone. Its elongated subway tile format allows for numerous installation pattern possibilities, striking a compelling contrast with its raw, natural look.
Cream of the crop
Reminiscent of Venetian palazzos, Cream Misto marble is known for its variegated tones—from soft cream to taupe—and for its pencil-thin veins. The Cream Misto Collection makes this universally loved marble available as tile, mosaics, and moldings. Elevate your space by seamlessly integrating this stone into your home, no matter your design style.
A marble for all occasions
The subdued mid-tone neutrals of Cream Misto make this marble a good choice for all kinds of installations. The stone’s subtle beauty is showcased in mosaics as well as in bold, large-format tiles. Choose Cream Misto to dress up a fireplace surround, bath, patio, and more. A polished finish adds shine, while a honed finish imparts quiet sophistication.
Key Specs
-
Commercial
Wall Only
-
Item Color
Cream Misto
-
Item Size
3" x 12"
-
Material
Marble
-
Residential
Wall Only
-
Tile Finish
Textured
Detailed Specs
-
Available Sizes
1x12", 2x12", 3", 3x12", 12x24"
-
Coverage
0.25
-
Location
Backsplash, Bathroom, Indoor, Kitchen, Outdoor
-
Look
Marble Look
-
Made In
Turkey
-
Pieces Per Box
20
-
Sample Size
3" x 12"
-
Sq Ft Per Box
5
-
Stone Type
Cream Misto
-
Tile Thickness
12.5 mm
-
Tile Use
Backsplash, Bathroom Wall, Kitchen Wall, Outdoor Wall, Wall Tile
-
Weight
44 lbs
Installation Stone Tile
Make sure all your products, substrate, tile, thinset and grout are compatible with each other. Inspect all materials before use and getting started. Dry lay or do a mockup to confirm your layout, grout joint size and that the final look meets your expectations.
Substrates preparation
An installation is only as good as the structure that it is installed on. Most adhesives and mortars will warranty most substrates, (Gypsum wall board, Cement Board, Cement Masonry Unit and Plywood). Make sure the substrates are structurally sound and free from any sealers or contaminants for both vertical and horizontal installations. Does the floor or wall bounce? The load deflection standard is L/720 for Stone Tile.
TileBar Tech Tips:
- Try the drip test – drip water on your substrate and if it absorbs then you can ensure that your mortar adhesive has both a mechanical and chemical bond. If the water beads up then there is a bond breaker on your substrate. This could be a wax or sealer.
- Use a straight edge and level - Flatness ANSI A108.02 (1/4” of change in 10’, 1/8” for stone) with no bump greater than 1/16”
- Always check your adhesive instructions noting the suitable substrates and limitations as it relates to any backing
Lay Out
Take all measurements of the space or room and develop a layout plan. Locate all cuts and adjust layout as necessary. Confirm the final layout, cuts, joints, and overall LOOK. Use proper equipment to cut your tiles (wet saw, drill bits, snap cutter or grinder). Make sure to follow all safety precautions and protection noted by the equipment used. Blend tile materials to ensure consistency throughout the project area. With larger tiles, waste factor is high, and more material may be needed.
Adhesives and Mortar
Make sure you use the proper directional troweling technics and the proper trowel size. To achieve the appropriate coverage, see the trowel chart below:
|
Longest Edge Measurements |
Suggested |
|
Tile Size |
Trowel Size |
|
Mosaic Tile |
1/8" x 1/8" |
|
2" through 3" |
1/8" x 1/8" |
|
3" though 6" |
1/4" x 1/4" |
|
6" through 12" |
1/4" x 3/8" |
|
12" though 24" |
1/2" x 1/2" |
*If you are installing a tile with any edge longer than 15” be sure you are using a Large and Heavy Tile Mortar.
Install Overview:
- Mix the mortar per the instructions.
- With a damp sponge clean off the substrate and tile
- With the flat side of the trowel “burn” the mortar into the substrate and larger tiles
- Trowel material on the floor or wall with the appropriately sized trowel in a consistent direction leaving a ridged setting bed.
- Lay tile in the mortar and flatten the mortar ridges by pushing the tile perpendicular to the trowel direction.
- Install spacers as needed or leveling system as needed
- Make sure grout joints are clear of extra mortar materials.
- Let system cure fully until grouting begins, usually 24 hours.
TileBar Tech Tips:
- Do not work too far ahead. Make sure that the mortar stays fresh and has not skimmed over.
- Mosaic tile sheets can be offset to hide some of the sheet joints.
- Use a beating block or grout float to set your mosaic tile
- Mosaic tile is mounted to the sheet and this determines the grout joint size. Take a step back and make sure the sheets perimeter joints are the same as the joints that are in the sheet. If you can see the individual sheets you may need to adjust and that is normal..
- Minimum mortar coverages should be evenly distributed and cover 80% of tiles in a dry area and 95% in wet areas. Once you set tiles pull up a couple to ensure proper coverage
- Choose the appropriate grout joint size, remember smaller is not always better. The grout joint size depends on how consistent the edge of your tile.
- Directional troweling: https://www.youtube.com/watch?v=Way5bMh-eYg&t=31s
Grout
Grout can make or break a new tile project. A great grout job can aesthetically enhance the project.
Install Overview:
- Stone is naturally porous you may want to consider a grout release. This should make your grout clean up a lot easier.
- Mix the grout per the instructions.
- Remove spacers as needed
- Using a grout float at 45-degree angle to press in and fill all the grout joints.
- Cut the grout off the top of the tile using the grout float dragging it at 90 degrees angle diagonally across the tile as a squeegee.
- Now that the joints are full dress them with a sponge or scrub pad.
- After a 15-20 minutes clean again with clean water and sponge and let cure.
- After the grout has dried, there will be a grout haze and it can be buffed with dry cloth
- Limit use until fully cured, usually 24 hours.
TileBar Tech Tip:
- Use clean water, A LOT!
- Don’t get too far ahead. Clean in a timely manner what you just grouted.
- Clean sponge often, typically 1 swipe, flip the sponge over and 1 swipe, then rinse the sponge clean.
- Make sure the joints do not have dust or debris in them. Also, any thinset that has squeezed up needs to be removed.
- All installation must have movement joints. Use a color matched acrylic or silicone sealant to provide movement protection. Movement joints are for all transitions, base, inside and outside corners.
- Keep the project area clean. Even the lightest dust could permanently stain any uncured grout joints.
- Use the right grout for your specific installation:
- Standard polymer modified grout
- High performance cement grout
- Premixed grout
- Epoxy Grout
Cleaning and Sealing
Keeping an installation looking new is not as difficult as you may think. Stone is naturally porous so a stone impregnating sealer should keep your installation protected. Depending on the traffic in the area will depend on how often you need to reapply. Regular cleaning the entire system with a neutral PH non-acidic cleaner should do the job. There are more harsh cleaners available and must use carefully by following all instructions. Always do a test area in a non-visible place
TileBar Tech Tip:
- Follow all instruction closely.
- The more the area is used the more often it will have to be cleaned and sealed.
- If an acidic cleaner is chosen, make sure you protect adjacent materials.