Visit
Visit 
Guide to Cutting Tile
 Copy Link
 Email
Email
 Twitter
 Pinterest
 Instagram
 Facebook
If you’re someone who is embarking on your first tile adventure in a new space, we salute you. As rewarding and beautiful as the final product is, we’re not going to lie, there’s a large task ahead of you before that part. Aside from pursuing options to finally select the perfect tile, you must make sure you’re sizing it properly. One thing that is bound to happen is a need to cut tile to fit your space. This, while seemingly tedious, isn’t impossible. Since we are tile experts, we are here to lend you a guiding hand and walk you through a thorough step-by-step process to cutting your tile. This way, you can go from creation to production with little stress.
In order to do this right, we’re going to first cover the two most popular (and safest) ways to cut tile. This first way is with a manual tile cutter, or tile snapper, which is basically a simple tool that scores the tile then through applying pressure, snaps it. The second way is by water saw – handheld or standing table. While we’re going through the process now, we’ll expand on what a water saw is in more depth later. For now, just know that it’s a tool that uses a diamond blade that’s water-cooled which results in seamless cutting.
Here’s the rundown on each:
Tile Snapper
A tile snapper is the perfect piece of equipment to use for base needs when cutting tile. It can’t do fancy things like curving easily, but for straight cuts, it’s ideal. Let’s go through the steps so you can turn-out a beautifully cut tile each time.
Step 1: Set The Tile Up
A bit of a no-brainer, the first step is to simply set up your tile. Place it firmly against the edge of the cutter. You’ll want to lift the handle up, and tilt the pressure pad so it is out of the way. Make sure that the cutting wheel meets the tile at the bottom edge, where you plan on cutting it.
Step 2: Scoring The Tile
Once your tile is safely placed in the equipment, it’s time to get to scoring it. To do so, move the tungsten carbide scoring wheel from top to bottom of the tile. Sort of like you’re cutting a slice of pizza, let it go from one end to the other. You may want to score twice to make sure the marks are visible. But please make sure not to be overly aggressive with your scoring since it could lead to cracks.
Step 3: Snap That Tile
After you’ve scored the tile, it’s time to snap cut it! The way to do this is simple; lift the handle, let the pressure bar pad drop down onto the center of the tile, apply pressure to the handle and it will snap a clean line (if done correctly).
Step 4: Clean Cut Results
The final step is removing the tile from the machine, and starting on your design!
Please note, that you can cut sheets with a manual cutter, but the process is a bit more detailed. We’ll discuss this below under our mosaics section.
Watersaw (Handheld or Table)
A watersaw is a very versatile piece of equipment. It’s ideal for when you’re cutting tile that needs to be curved, holed, or diagonal. Though, it makes straight cutting relatively a breeze.
Step 1: Prep for Safety
Before you dive into your cutting project, make sure that you’re prepared. In order to do so, have gloves for hand protection and goggles for eye protection ready. This will help limit the risk of any byproduct harming either body part.
Step 2: Make Measurements // Mark The Tile
After protection is set, you can move to the first official step which is measuring. For this, you’ll want to use a marker and measure a line across the tile’s body for where you’re going to cut it. Make sure that you give space for expansion, ideally no less than 2 inches. This will help with grout joints later on.
Step 3: Fill the Tray with Water
Pretty straight-forward, make sure that you fill the tray with water so that the blade will not only be able to cool down, but lead you to the best results.
Step 4: Align the Tile
Once you’ve measured properly, and filled your tray with water, it’s time to get the tile ready for cutting! Align the tile on the table. Make sure that the fence is adjusted so that when you cut, you cut exactly on the line you’ve measured.
Step 5: Press The Button
Before you jump right in, and get your blade hitting tile, you’ll want to remove the tile from the cutting area. Then, turn your machine on, securing machines on both ends to ensure straight lines.
Step 6: Cut the Tile
Now that everything is aligned and safe, it’s time to move to the exciting part: cutting! To do this, hold the tile with both hands and push it along the fence into the blade. Make sure to continuously check the tray for optimal water levels, we highly suggest doing this before moving to a second cutting.
Step 7: Polish The Tile

The next step is merely for beauty. You’ll want to take a sponge and clean the tile to remove any excess dust or material. This will leave your tile nicely cut and in pristine appearance.
It should be noted that both pieces of equipment above can be applied to all ceramic; however, due to its durability, most porcelain tile does better with the saw. When it comes to other, more niche tiles, like glass or mosaics, there are separate steps and needs that we will go over shortly.
As you may know from personal experience, or will soon find out, the reason that cutting tile occurs is simple: the tile needed for the floor or wall simply doesn’t fit as a whole piece. This calls for resizing to make sure things look nice and flow. There are other times that you need to cut it to place tile on the floor around a toilet or to work around a door.
Other Tile Types & How To Cut Them
Glass Tile
When it comes to cutting glass tile, you have to be even more cautious than with ceramic. While ceramic is a softer body tile, glass tile is prone to shattering if cut incorrectly.
Mosaic Tile
Up until now, we’ve mentioned the tile snapper and wetsaw, but we’re going to shake things up again and introduce you to another type; tile nippers. When you embark on cutting mosaic tile, you face two obstacles: 1) Most are made from glass or a mix of glass and stone so shattering is a real fear and 2) The surface area is quite small. To avert disaster, what you’ll do for these tiles is follow steps 1 and 2 for the tile cutter above, and when it comes to step 3, you turn to tile nippers. Tile nippers look like plyers but are effective at cutting smaller mosaics in half, in a clean way, once they’ve been scored.
Types of Tile Cuts
Aside from the traditional straight line cut, there are other, more specific cuts that might be needed. These are outlined below.
Straight Edge
To re-emphasize, the straight edge cut is also known as a straight cut. This one is the most straight forward (pun intended) and is simply cutting off a certain amount of tile from the edge.
Curved
As mentioned, curved tile cuts come in handy when you need to cut around an area. This area could be a toilet, or door handle. You can use a water saw to cut this tile.
Holed
Hole cut is ideal for if you’re placing tile around piping or valves. This type of cut needs a drill and a ceramic hole tile saw. You’ll drill the size hole you need and then use the saw to cut it out smoothly. Make sure to keep the tile wet throughout the process.
Types of Tools to Use
Watersaw:
One of the pricier pieces of equipment, but by far the most user friendly, is the watersaw. This piece consists of water pump that keeps the blade clean as well as sharp and removes the excess materials post-cut. This machine, at its most basic level, can be found for about $100, with more advanced versions costing upwards of $500.
Tile Snapper:
The tile snapper, or a manual tile cutter, is a simplistic tool that will only set you back around $150/$200, if that. It has a carbide wheel that scores the tile, making it easy to see where you need to cut it. The pressure handle allows the tile to snap off, leaving you only with the size that you need. This product is best for straight cuts only.
Tile Nipper:
A Tile Nipper is the best choice when cuts need to be irregular. Much is the case for mosaics, as mentioned above. This allows you to cut smaller areas unlike the manual cutter or saw. Some of these available will have scoring ability to help ease the cutting process. On this list, these are the least expensive, with most pairs costing under $20.
Some Quick Tips
Don’t rush the process. It’s important to take time to make sure your measurements are exact. After all, to order additional tile would be costly and a headache for you.
Make sure to keep things safe. Always use gloves and/or goggles to protect your body.
If the job seems intimidating, consult a professional. Always better to invest in doing it right than wasting time doing it wrong.
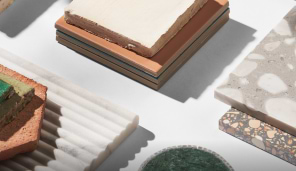
Now that you know the different ways to cut different types, shop our different tile materials and complete your new space or home improvement project with the perfect tile
Related Articles

Explore Our
Tilefinder